
I’ve been looking for a 40% keyboard a lot of time. I really liked the idea of having it because it’s fucking cute, nothing else, so I started to look for different builds. First I saw mercutio40 and loved it, the fact that it had an encoder and an oled for displaying the bongo cat was enough for me to get it. But the cost of shipping to Spain was too high and I didn’t want to spend that much money on a keyboard I was not going to use daily. So I started to research the 40% keyboard world. I saw a lot of github repos building some keyboards, but I didn’t like any of them, plus I wanted it to have PCB. Saw a lot of ortholinear keyboard too, but they are not of my taste.
After a lot of research, I found the DRP1N case on thingiverse. A multikeyboard case, which had 3 positions of the connector and a lot of holes on the bottom of the keyboard so it could fit any pcb.
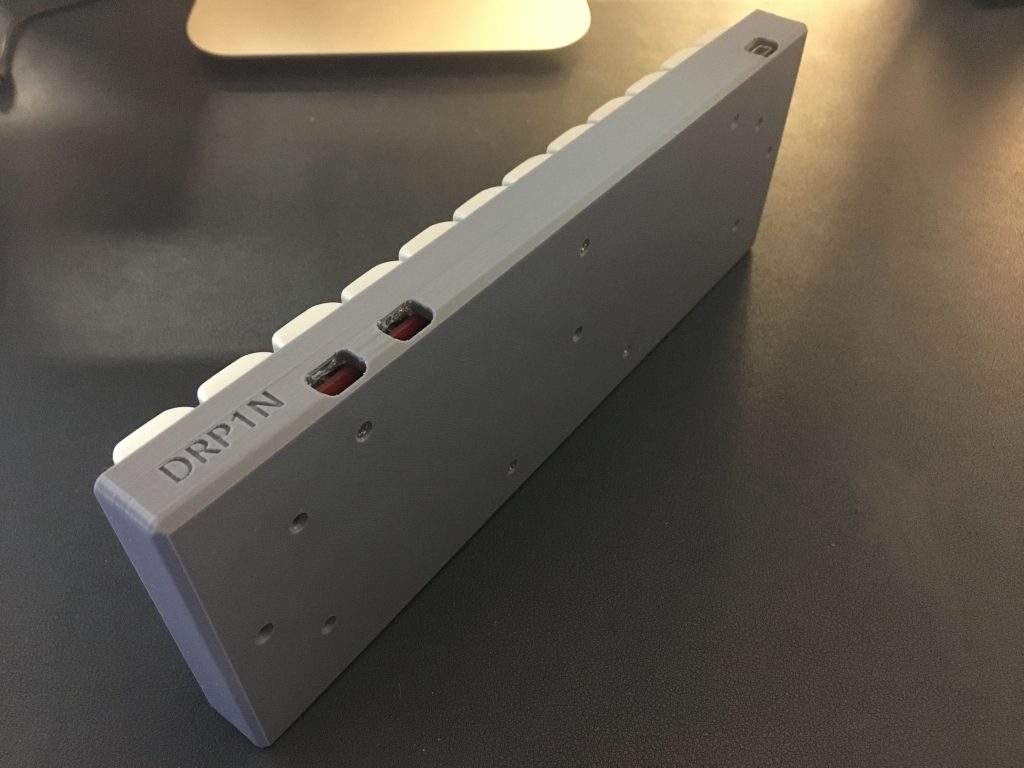
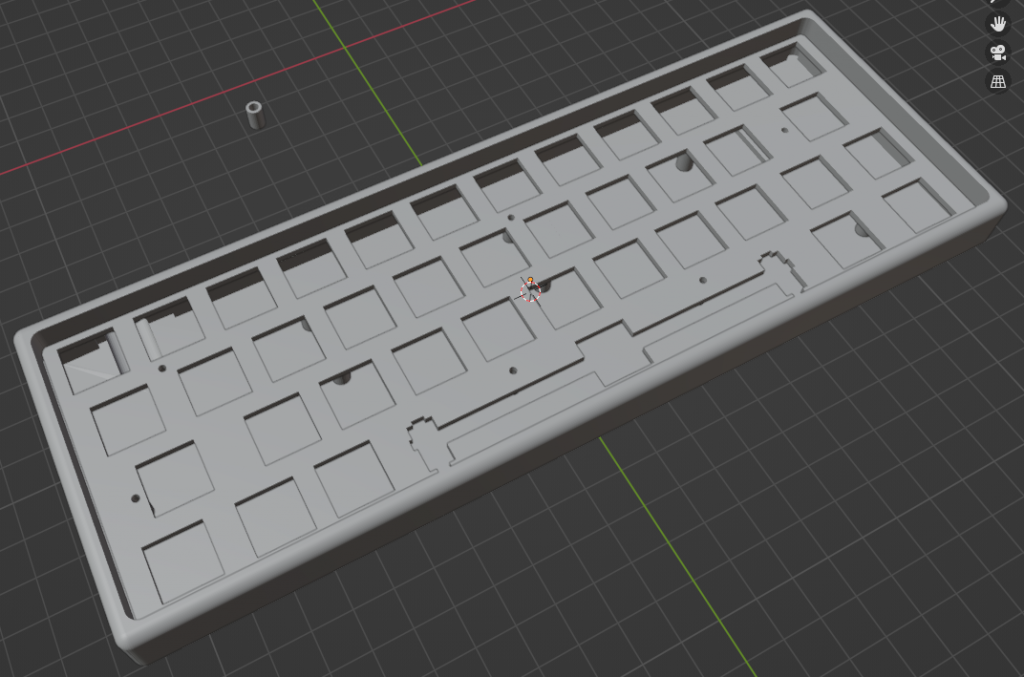
I really liked the idea of this case but I hated how it was built, so I placed it on blender and remixed the way I wanted. Closed the 2 left connector holes and every hole on the bottom, added some tubes to hold the plate, 6 of them with a middle hole to screw some M2 screws, and added a little holder on every side so it could hold the plate properly.
After this, I needed a plate to hold the switches. Found a guy who mounted a keyboard on this case and used a 3D printed plate, so I asked him if he would share it. That was a month ago, and still waiting for a response. Anyways, I started digging on thingiverse and google, and found a JD40 faceplate as a CAD file. Imported on blender, modified a bit to fit my case and et voilà! Already had the skeleton of my keyboard!
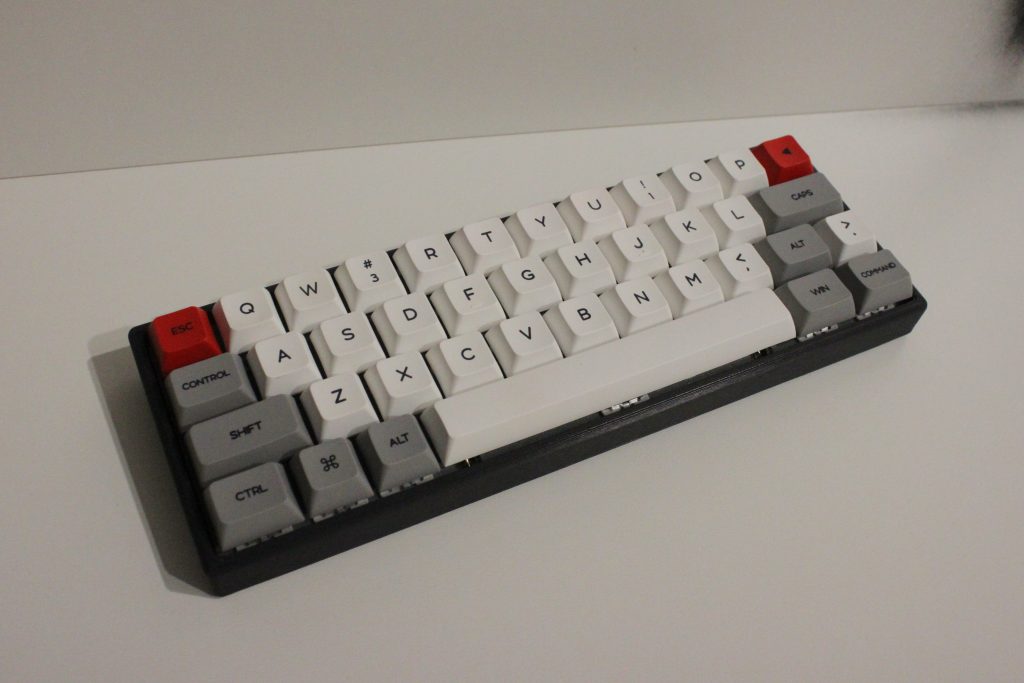
After a lot of iterations and modifiers, I finally made it to being usable, had to print a lot of tries and tweak the model after the tests, but finally happened to be a good case and plate.
All it remained was to put some switches, solder ‘em and connect the rows and columns to the arduino. Huh xd.
It was my first time doing all that stuff, but recently saw this guy on reddit who posted his own 40% handwired keyboard and a video about how to make handwired keyboards
I was ready. From now, I start the guide with the things you need to build the keyboard and the steps to do it. Enjoy!
BOM list:
- 3D printed case and plate
- 40 switches, I bought ‘em on aliexpress
- Plate mount stabilizers, you just need the spacebar one. Bought on aliexpress too
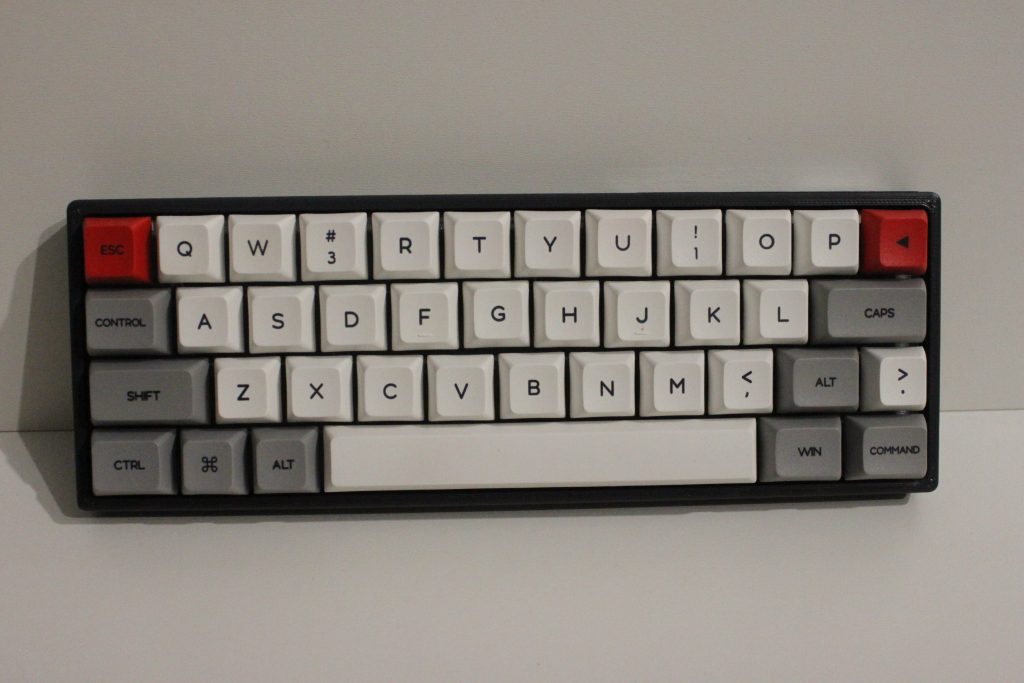
- Set of keycaps. I used an old set that came with my first keyboard (epomaker gk68xs)
- Arduino pro micro
- Micro USB cable with data cables
- USB-C female
- One regular switch for the reset pins
- 1N4148 diodes, one for every switch (40x)
And the tools you will need are:
- Soldering iron
- Tin
- Maybe a drill
- Kepton tape
- Wire
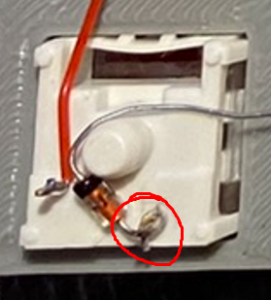
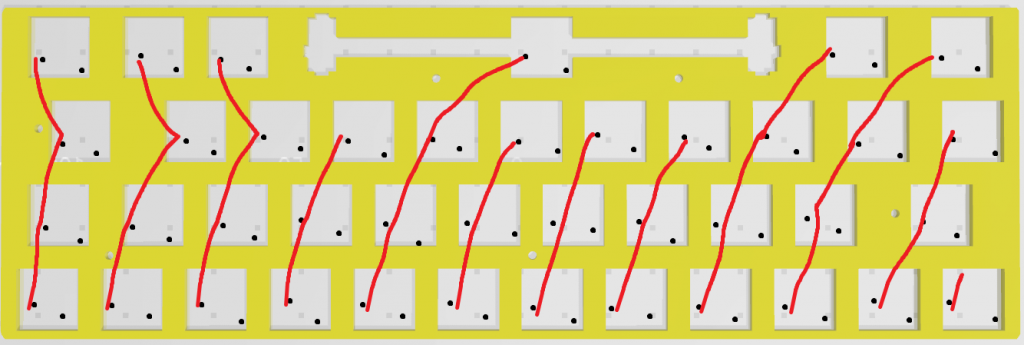
Once all the switches are placed on the plate, it’s time to solder rows and columns. I started from the rows. Place a diode on this pin:
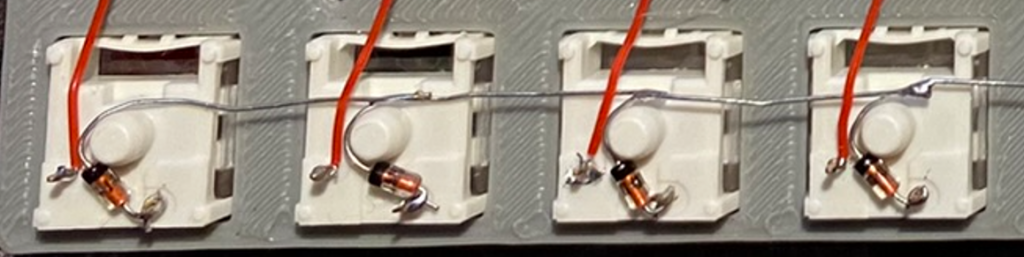
Instead of using wire to solder the rows, I used the same diode to connect to the next one:
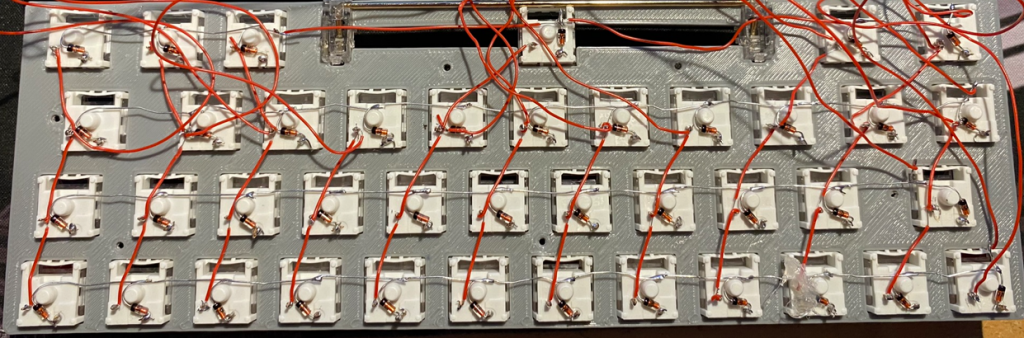
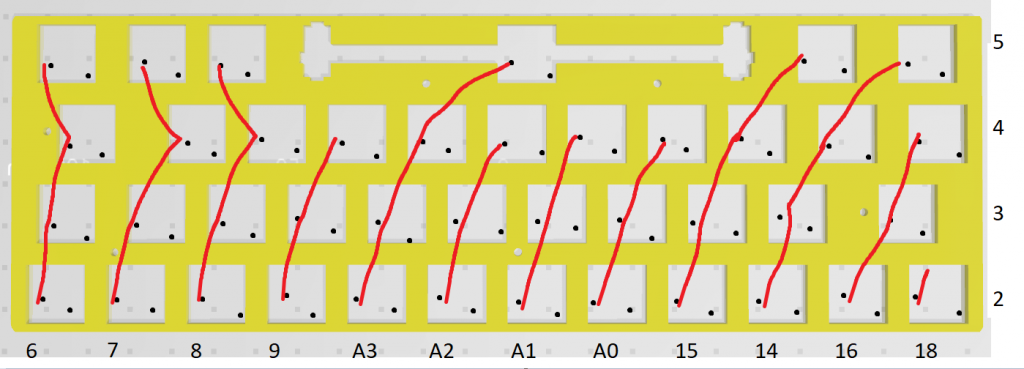
After wiring all the rows, it’s time to solder the columns. This was harder because I had no clue on which order I had to solder ‘em, so I fucked it up and had to resolder some of the columns. This is the order:
It has to look like this (more or less, this is a fucking mess)
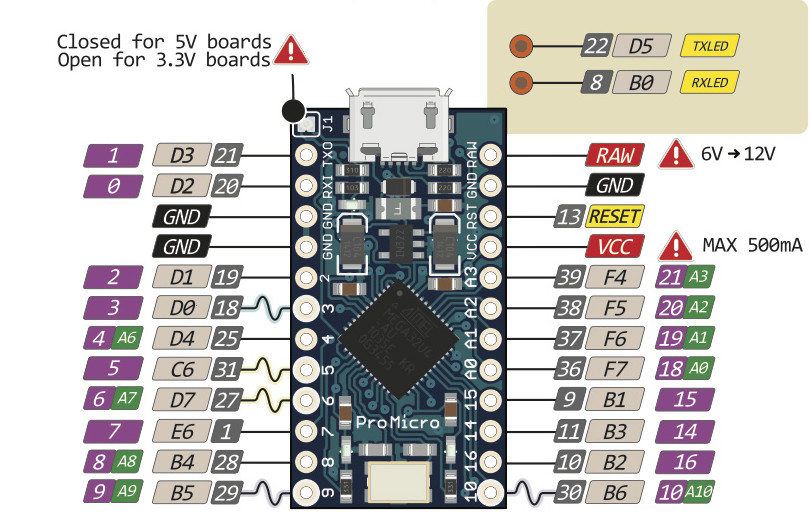
Then, you will have to solder rows and columns to the Arduino gpio. This is the order:
rows from R1 to R4: pins 2, 3, 4 and 5
columns from ESC key to BACKSPACE: pins 6, 7, 8, 9, A3, A2, A1, A0, 15, 14, 16, 18
Here’s an image of the pinout diagram:
I’m posting the QMK configuration too. For flashing the firmware, I used JD40 as base and modified the rows and columns on the config.h. I modified the default keymap too. I’m not a pro of QMK, in fact, this is my first project compiling my own configuration, so if you want to know more of QMK, check this links.
This is what I’ve done to make it work. In case you want to skip this process, here’s my .hex file ready to be flashed on the arduino with my own keymap:
- Installed qmk on WSL. This was a fucking headache because python is not updated on Debian WSL. First, I had to update wsl system, and then install the distro I wanted. After that, I installed python3 and checked the version.
sudo apt-get update && apt-get upgrade

apt install -y python3 python3-pip

python3 -V
If python3 version is above 3.7, it will work.
apt-get install -y git

python3 -m pip install --user qmk
In Debian distro there’s a bug of home directory. You will have to run this command first:
echo 'PATH="$HOME/.local/bin:$PATH"' >> $HOME/.bashrc && source $HOME/.bashrc

cd /root

qmk setup
- Then modified the config.h of JD40 and default keymap. You can find ‘em here
To compile it, run from the qmk_firmware directoryqmk compile -kb jd40 -km default
- After compiling it, the system will store the .hex file on qmk_firmware/.build. You will have to flash it to arduino with the program QMK Toolbox. To flash it, you will have to short the reset pin with a gnd one. If you already closed the case (happened to a friend, not me hehe) and you need to flash it again with the keymap modified, I recommend drilling a hole in the right side, and solder a regular switch to the reset and gnd pins.
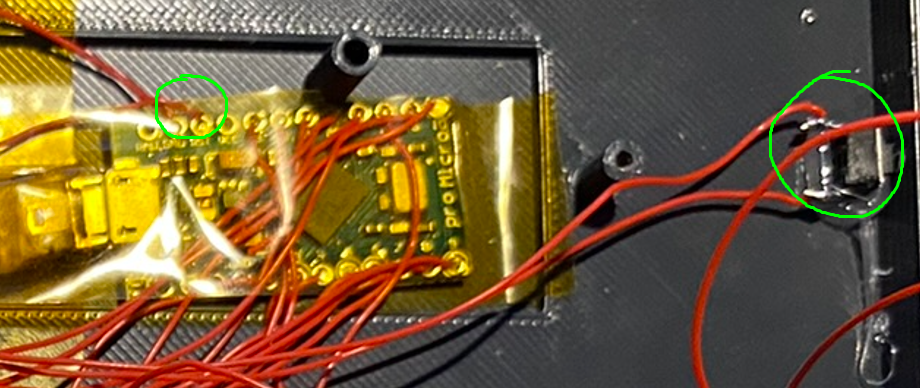
 This way, you will have access to the reset button even if it’s already closed, so you can flash as many times as you want.
 - Open QMK Toolbox, select the .hex you just compiled, press the reset button and flash it.
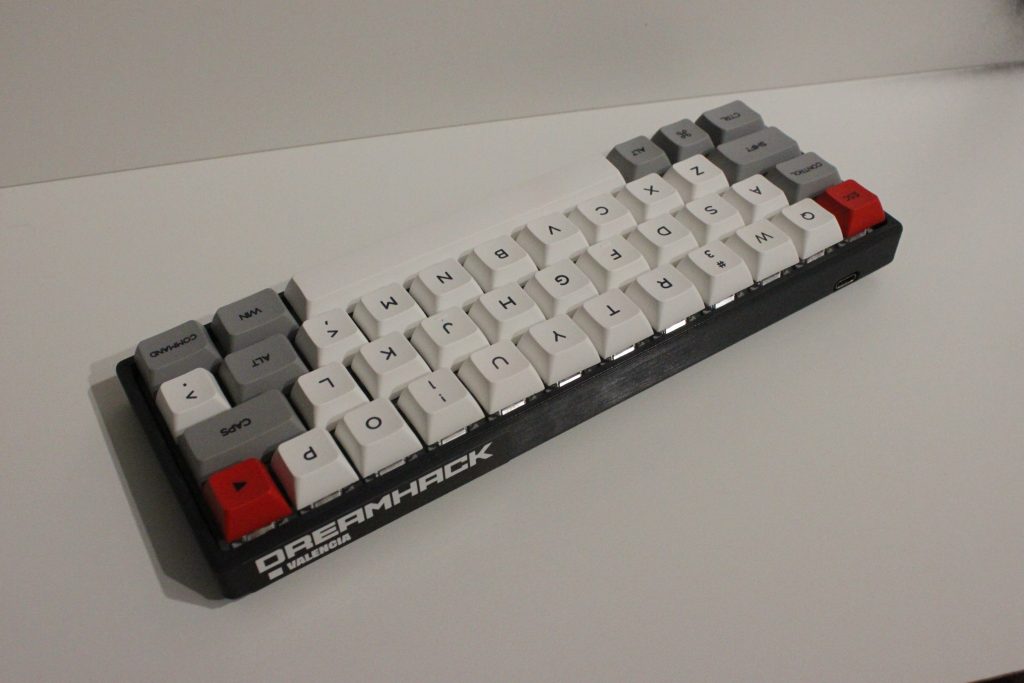
Now you have a nice 40% keyboard fully working.
I’m posting links of interest of this topic, most of them inspiring this work: